Hello!
Here’s a step-by-step guide to installing mods on your Satisfactory server.
To briefly explain: you need to use the SatisfactoryModManager (SMM) application on your PC, then enter your server’s SFTP credentials. With just two clicks, mods are automatically added to or removed from your server.
Let’s get started!
1) Download SMM
- Go to the SMM GitHub page:
- https://github.com/satisfactorymodding/SatisfactoryModManager/releases
- Download the latest version by clicking Download.
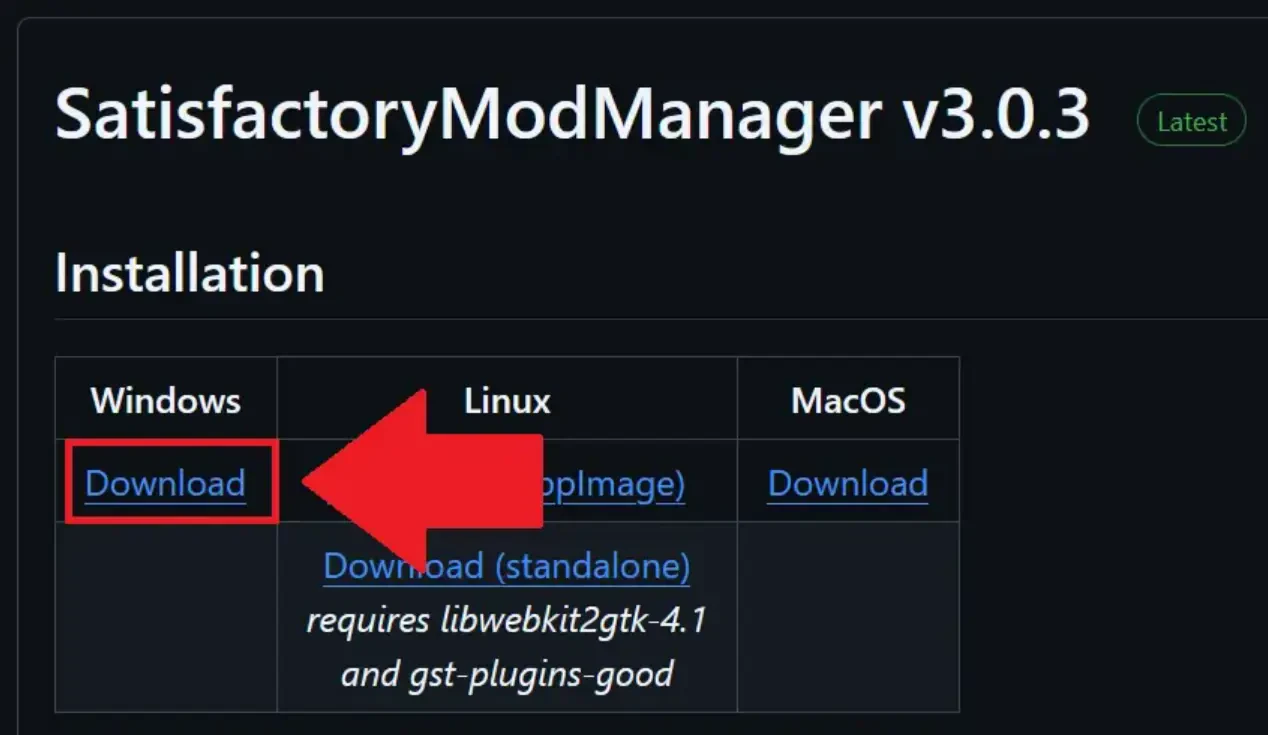
- Run the downloaded file :
SatisfactoryModManager-Setup.exe and follow the installer steps. - Select English as the installation language.
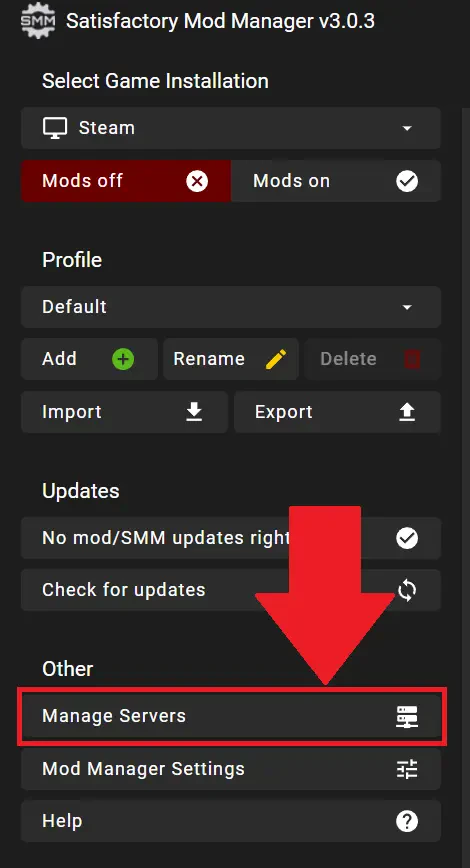
2) Add Your Server
- In the menu bar, click Manage Servers.
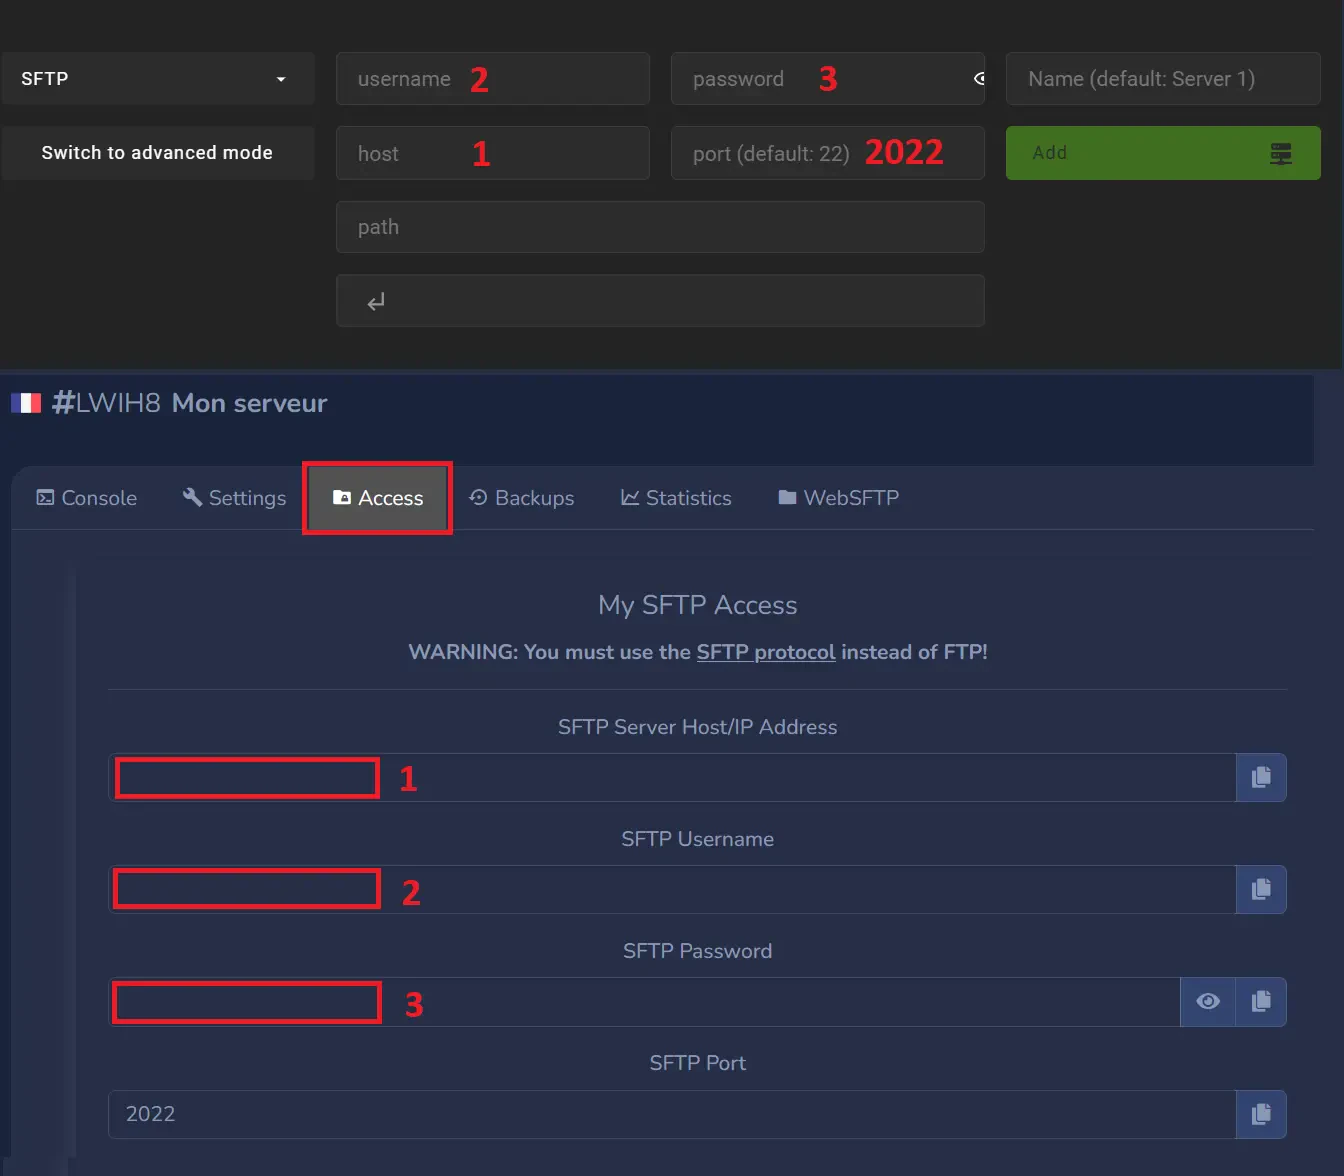
- A pop-up will appear. Enter your server’s SFTP credentials, which you can find in your panel under “Access”:
- Next, select the SatisfactoryDedicatedServer folder and click Add:

- Once the server is added, select it in SMM at the top left:
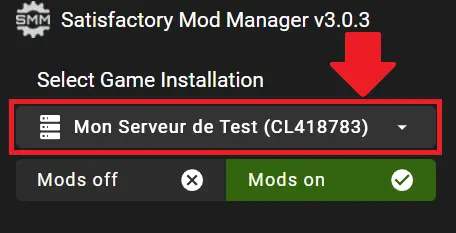
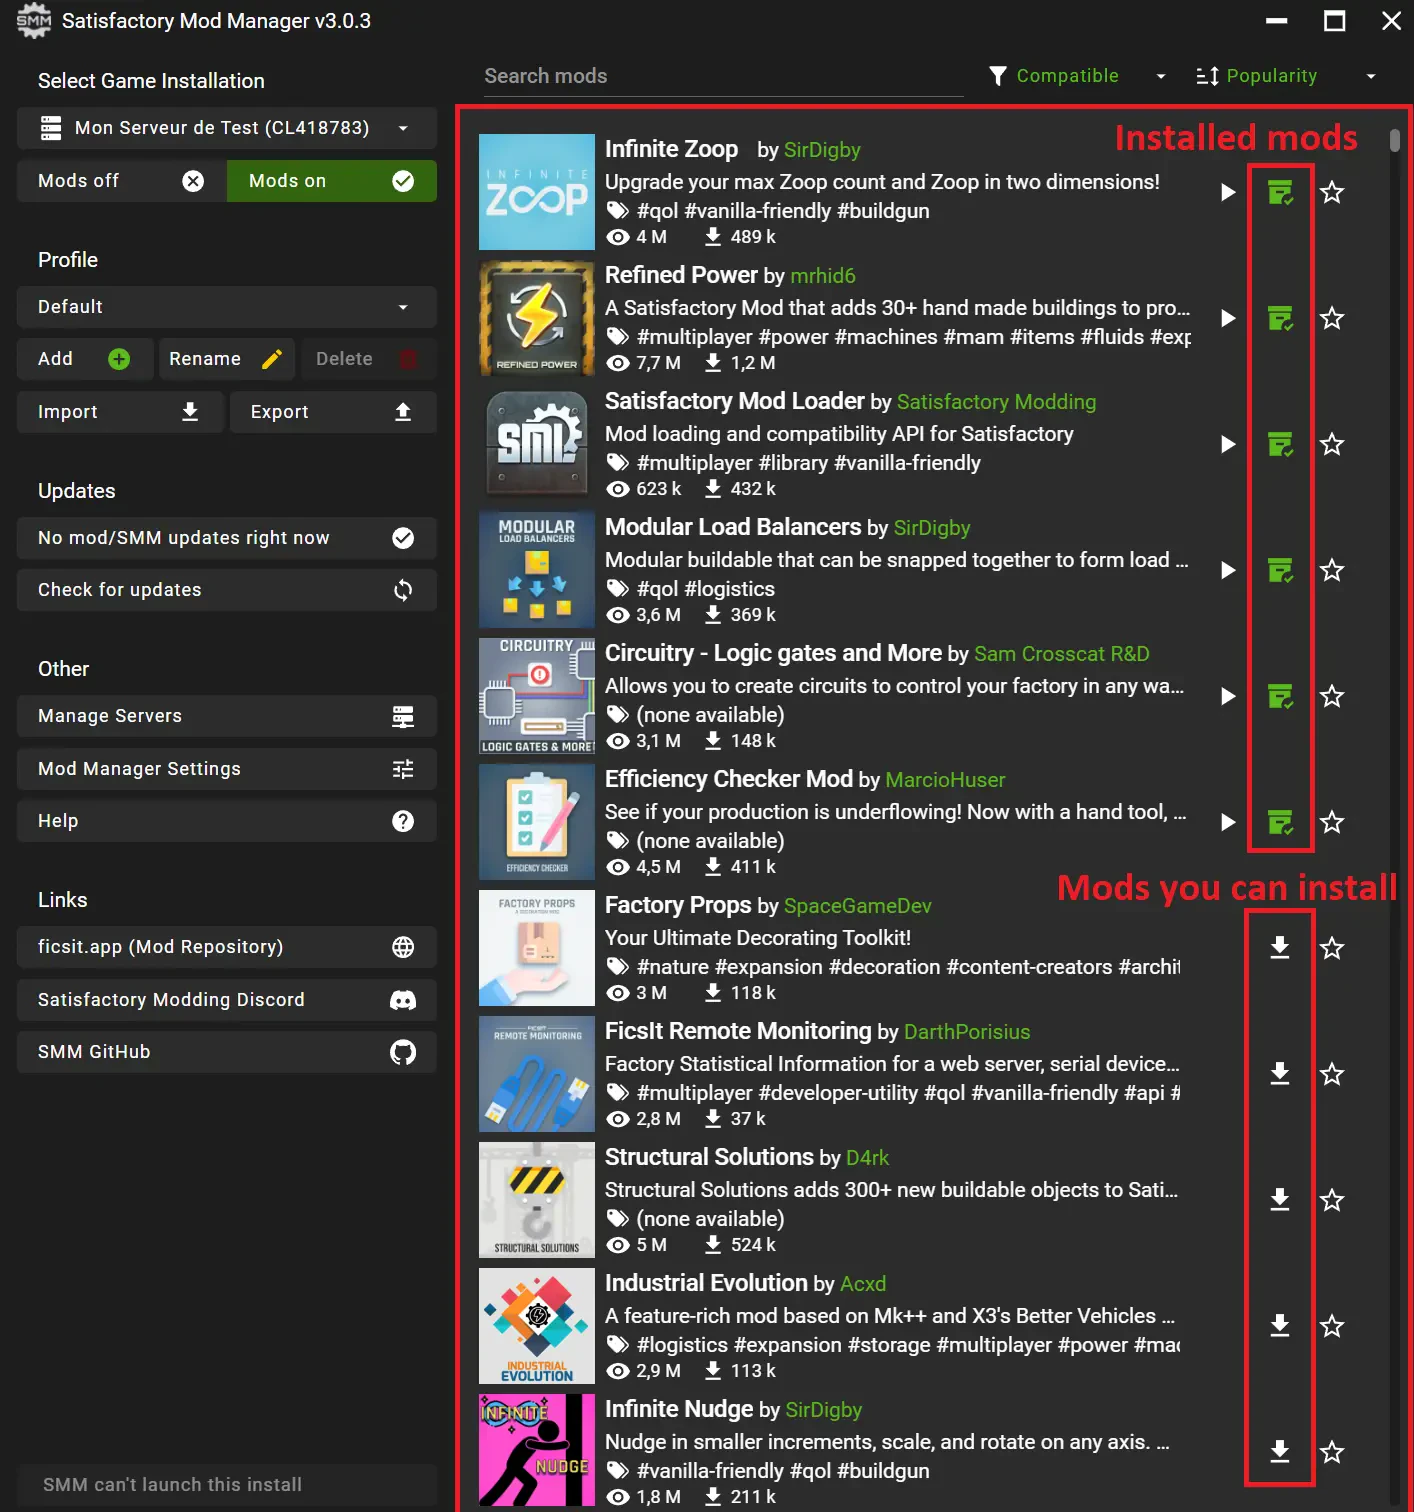
- And that’s it! You can now add mods by clicking the right-hand menu. Mods will be automatically uploaded to your server.
- Restart the server to apply the mods once installation completes.
And there you have it! With this tutorial, your Satisfactory server will have the desired mods. You won’t need to change anything on your client, you can launch the game and connect.
That’s all. If you need more details, feel free to join our Discord or open a ticket via the panel.