Want to add features to your Minecraft server without messing with FTP or manual uploads? Good news: in 2026, MineStrator lets you install many plugins in one click, directly from your server panel.
In this quick guide, you’ll learn where to find the plugin installer, how the one-click install works, and what to double-check before you restart your server.
Install a plugin in one click
Open your server panel, then go to the Plugins tab. Use the search bar to find the plugin you want to add.
For this example, we’ll install LuckPerms. Once you’ve found it, click Install and the panel will download it automatically.
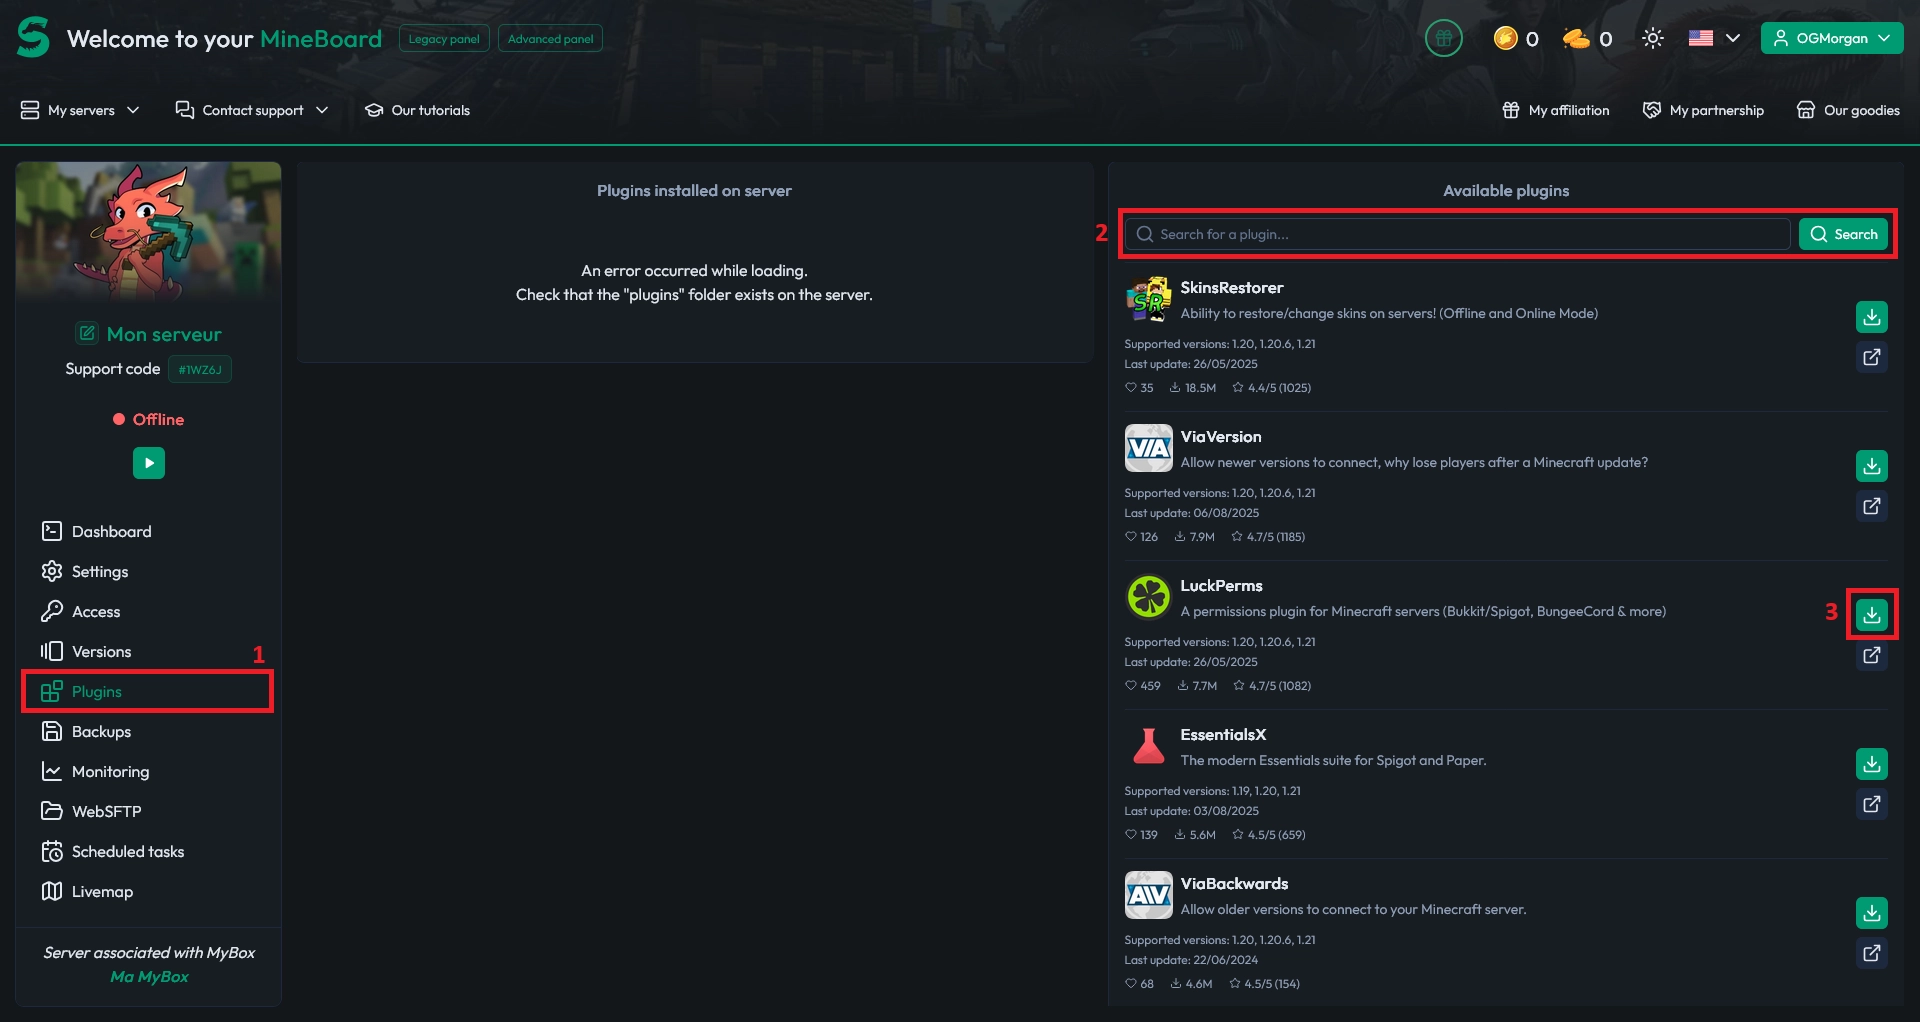
⚠️ Warning: Some plugins are listed on Spigot but are hosted elsewhere. Examples include EssentialsX or ViaVersion. If you install the wrong file from an index page, it may be invalid and won’t load.
Restart your server to enable plugins
Once you’ve installed all the plugins you need, restart your server so they can load properly. After the restart, check your console to confirm everything started without errors.
If a plugin doesn’t appear to work, verify its version matches your server software (Paper/Spigot) and your Minecraft version.
📝 Note: One-click installation only downloads the plugin file. If the plugin needs extra setup, you’ll still have to configure it manually, especially for plugins using an extra port like VoiceChat or DynMap.
Conclusion
You now know how to install Minecraft plugins from your MineStrator panel in just a few clicks: search, install, then restart. It’s the fastest way to upgrade your server without headaches.
Need a server to start building your plugin stack? Try it free for 12 hours, no credit card required.

 Enjoy 10% off your first month of server with MineStrator using the code ACTU10!