
Your Minecraft server needs ranks, staff roles, and player commands without handing out OP like candy? LuckPerms is the go-to permissions manager in 2026, whether you run a small survival with friends or a public server.
With LuckPerms, you decide exactly what each player or group can do: commands, moderation tools, plugin features, and more. It exists as a plugin (Paper/Spigot/Bukkit) and as a mod (Forge/NeoForge/Fabric), so it fits almost any setup.
In this guide, you’ll learn how to install LuckPerms, use its web editor, create your first groups, assign permissions (including EssentialsX examples), and apply ranks to players safely.
Why LuckPerms is worth using
On a Minecraft server, permissions control which commands and actions players are allowed to use. Without a proper system, everyone stays limited like a default player, or you start giving OP to “trusted” people and chaos follows.
LuckPerms solves that by letting you create groups (Player, Mod, Admin, VIP) and grant only the permissions they need. It’s cleaner, safer, and way easier to maintain than manual OP management.
You can download it from the official LuckPerms download page. We’ll use the plugin version here, but the workflow is almost identical for the mod version.
Install LuckPerms on your Minecraft server
Installing LuckPerms is quick: download the right file, upload it to the correct folder, then restart your server. The only difference is whether your server runs plugins (Paper/Spigot) or mods (Forge/Fabric).
Install as a plugin (Paper, Spigot, Bukkit)
If your server is Bukkit-based (Paper/Spigot/etc.), download the plugin version of LuckPerms and grab the .jar matching your Minecraft server version.

Upload the file into your server’s plugins folder, then restart the server. If you need a step-by-step upload guide, follow this tutorial to install plugins on your server.
Install as a mod (Forge, NeoForge, Fabric)
If your server is modded, download the mod version of LuckPerms for your modloader (Forge, NeoForge, Fabric). Picking the wrong file is the fastest way to get a startup error.
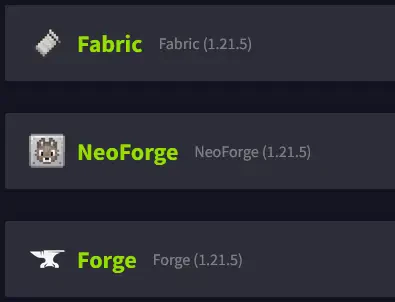
Place the .jar into the mods folder, then restart the server. If you’re new to modded hosting, use this guide for installing mods on a server.
📝 Note: LuckPerms works almost the same as a plugin or as a mod. The commands and the web editor are essentially identical.
LuckPerms can also run on proxies like Velocity or BungeeCord, but that setup is more advanced. For this tutorial, we stick to a classic single-server installation.
After restarting, check your console logs. If everything is fine, you should see something like [LuckPerms] Successfully enabled. From now on, you can stop relying on OP for day-to-day permissions.
Understand groups, inheritance, and the editor
Before you start assigning permissions, you need the basic LuckPerms logic. It’s not complicated: you create groups, add permissions to them, and put players into the right groups.
LuckPerms is built around three core ideas: groups (roles), inheritance (roles that include other roles), and a web editor (so you don’t have to suffer through endless commands).
Groups: a set of permissions shared by multiple players
Inheritance: one group can include another group’s permissions
Web editor: a visual interface to manage everything
Open the LuckPerms web editor
The web editor is the feature that makes LuckPerms so popular. You edit permissions in a clean UI, then apply everything in one click when you’re ready.
Run this command in your server console or in-game (if you already have access):
/lp editorLuckPerms will print a link in the console. Open it in your browser, then enter the code shown in the console to unlock the editor session.
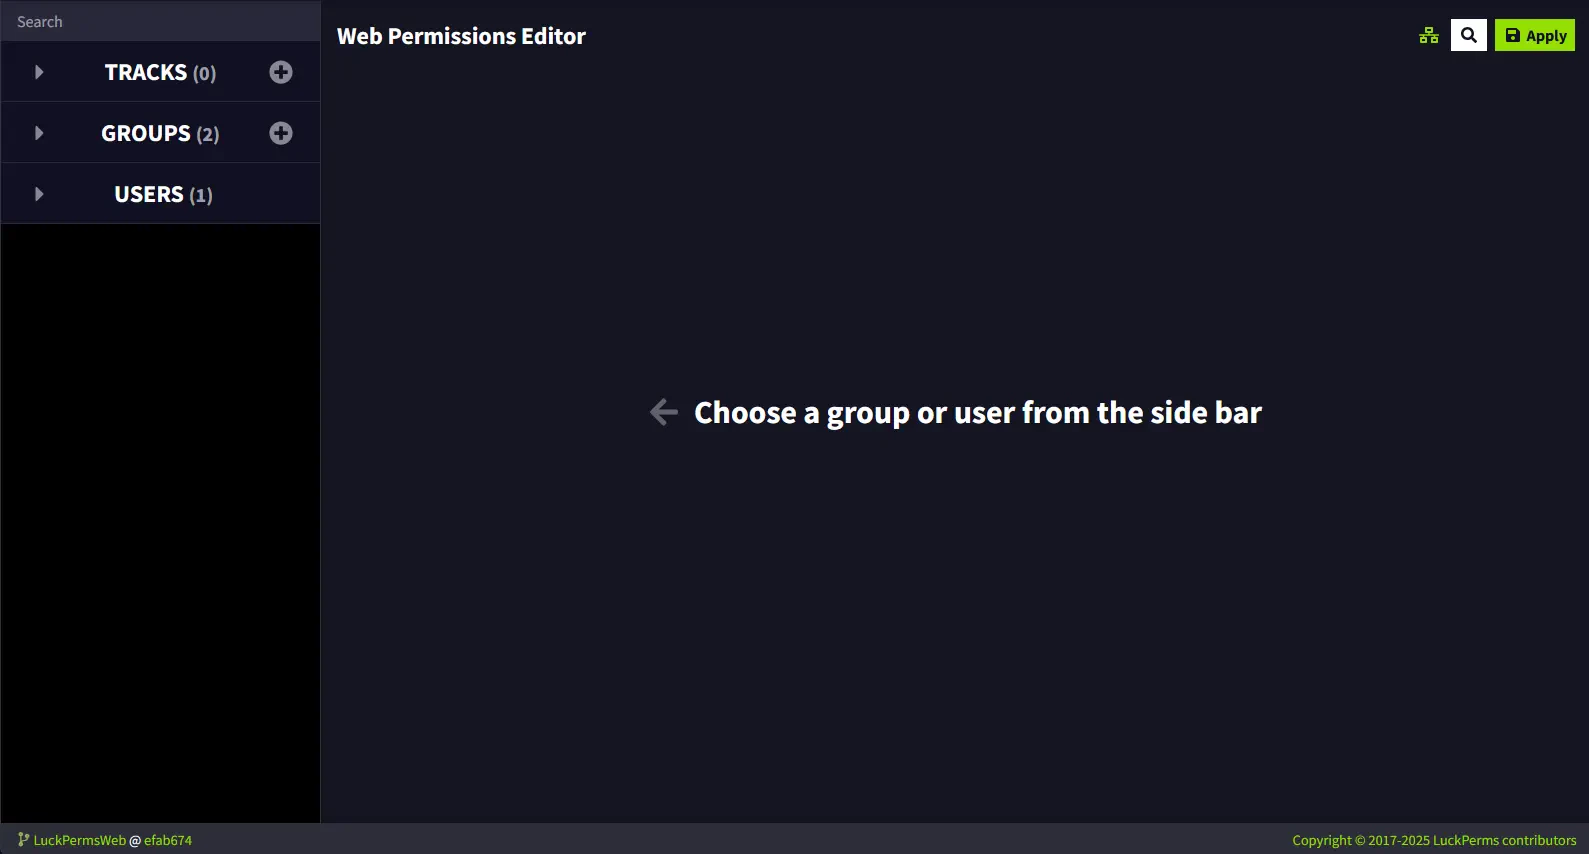
💡 Tip: Keep the editor tab open while you work. You can stack changes and hit Apply once, instead of spamming updates.
Create an admin group with full permissions
To demonstrate how LuckPerms works, let’s create an admin group with full permissions. Use this group for yourself and only your most trusted staff.
Create the group in the editor
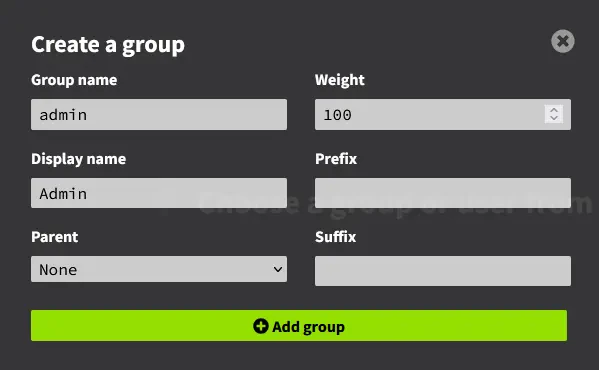
In the editor’s Groups column, click the + button. A group creation window will pop up.
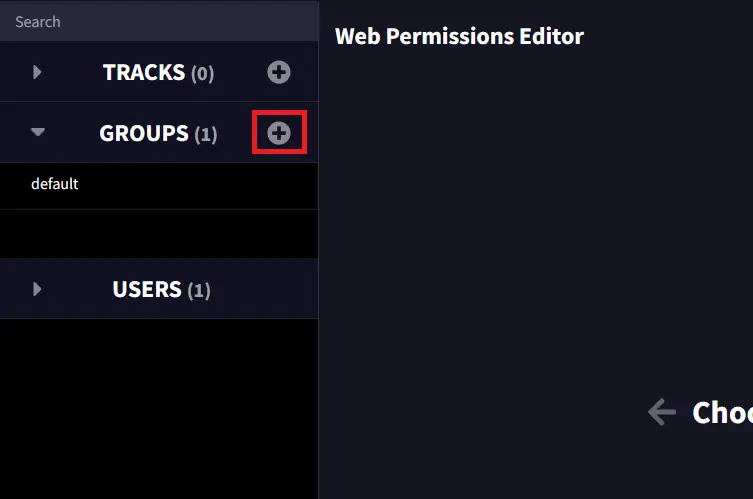
Fill the fields like this:
Group name: internal name, e.g.
adminDisplay name: readable name for some plugins
Parent: optional inherited group
Weight: priority vs other groups
Click + Add group to create it. Your admin group is now listed in LuckPerms.
Grant full permissions with *
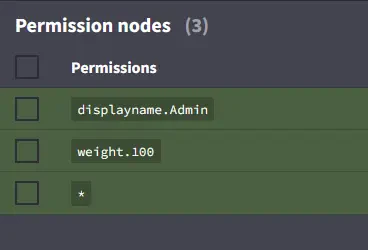
Select your admin group. In Add permissions, enter the wildcard permission *, then click Add.
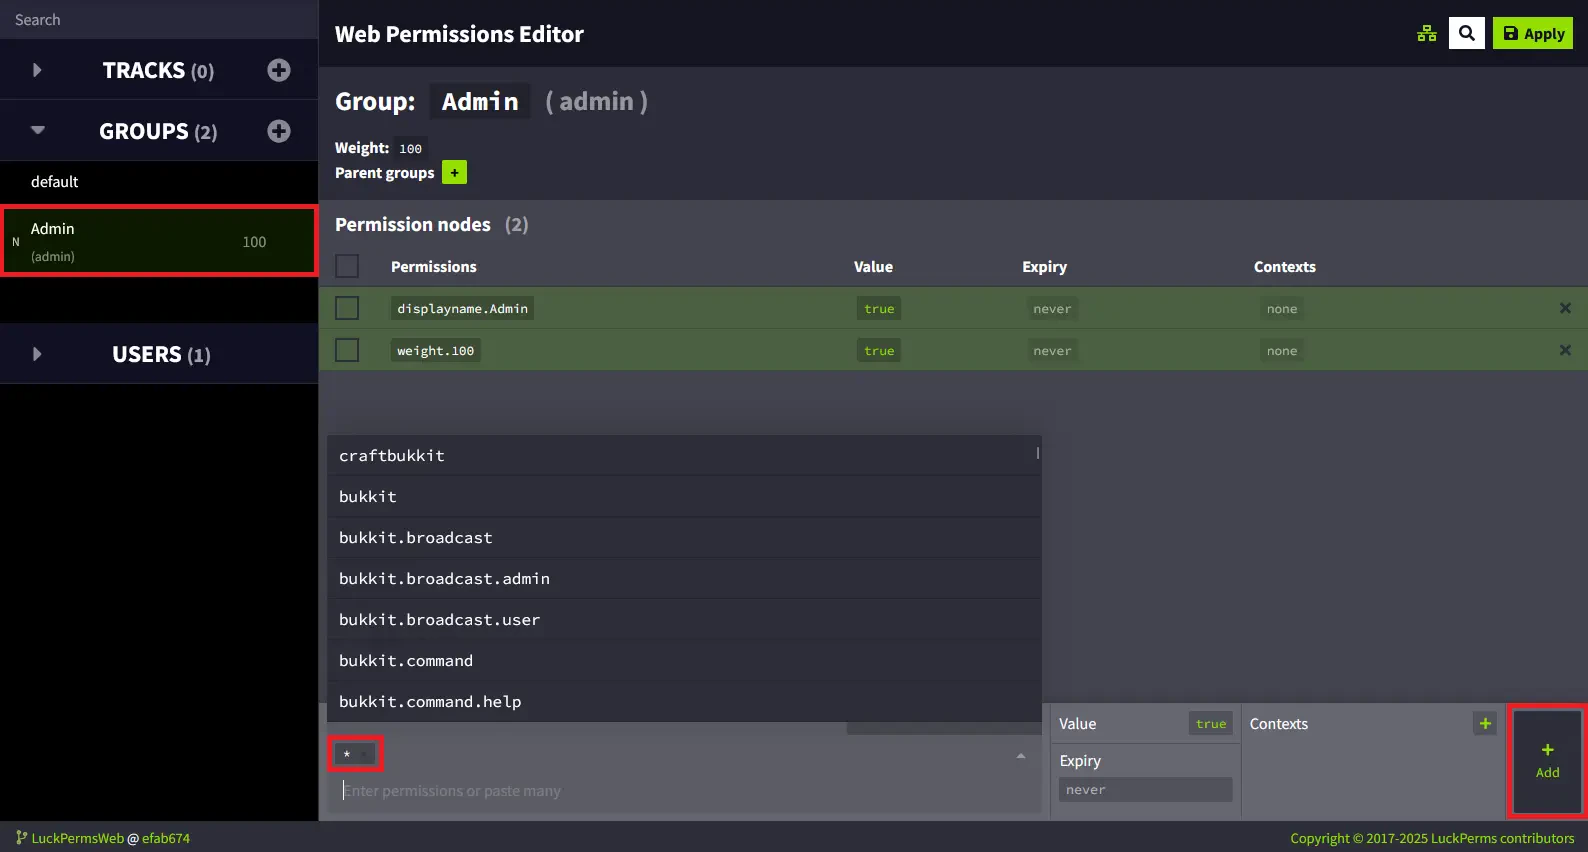
The * permission should now appear in the group’s permission list.
💬 Good to know:
*is a wildcard that grants every permission on the server. A permission likeessentials.*only affects EssentialsX.
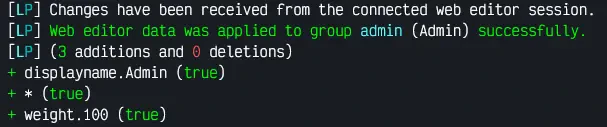
To push your changes to the server, click Apply in the top-right. The green lines turning grey means the edits were successfully applied.
You should also see confirmation lines in your server console as LuckPerms updates groups and permissions.
Assign the admin group to a player
Your admin group exists, but nobody has it yet. Make sure your Minecraft account has joined the server at least once, otherwise LuckPerms won’t find your user entry.
Run this command in the server console:
/lp user group add admin Replace admin with your group’s internal name. If it worked, the console will confirm the group was added.

⚠️ Warning: Don’t hand out the
*group to too many people. Full permissions means full damage potential.
Create a player group for EssentialsX commands
Now for the part your community will actually feel: a clean player group with useful commands, without admin power. In this example, your survival server uses EssentialsX.
The goal is simple: let players use /sethome, /home, and request-based teleports like /tpa and /tpaccept, without needing OP.
Create the player group
Open the editor again with /lp editor if needed. In Groups, create a new group named joueur (or player if you prefer English naming).
Select the group in the list so you can start adding permissions to it.
Add home permissions
In Add permissions, add these EssentialsX permissions:
essentials.sethomeessentials.home
This enables /sethome and /home for every player in that group.
Add teleport request permissions
For the full list of EssentialsX permissions, check the EssentialsX permissions documentation.
Add at least these permissions for basic player-to-player teleport requests:
essentials.tp.otheressentials.tpaessentials.tpacceptessentials.tpacancel
💡 Tip: Organize permissions by category (homes, TP, moderation, economy). Future you will thank you.
Click Apply to send changes to the server. Then assign players to the group with a command like this:
/lp user group add joueur Players in this group can now use homes and teleport requests, while your server stays OP-free and under control.
Frequently asked questions
Should I remove OP when using LuckPerms?
Yes, it’s strongly recommended. Instead of OP, give trusted people a dedicated group (like admin with * or a more limited staff group). This keeps your Minecraft server permissions clear and reduces abuse risks.
How do I find a plugin’s permissions?
Most plugins list permissions in their documentation or on their official page. For EssentialsX, use the complete EssentialsX permissions list, then paste the nodes into LuckPerms.
Can I manage permissions in-game without the editor?
Yes. LuckPerms has plenty of commands, and they’re great for quick changes like adding a user to a group. For building a clean permissions structure, the web editor is still the fastest and least error-prone option.
Does LuckPerms work with BungeeCord or Velocity?
Yes, you can install LuckPerms on a proxy to centralize permissions across multiple servers. That setup is more advanced and often involves a database and synchronization, so it’s best to master the single-server setup first.
Conclusion
You now know how to install LuckPerms, open the web editor, create groups, assign permissions (including EssentialsX commands), and give ranks to players without relying on OP. That’s the foundation of a secure, well-managed Minecraft server.
Want to put it into practice on a smooth, stable host? Start your Minecraft server in minutes with MineStrator, or try it free for 12 hours, no credit card required.

 Enjoy 10% off your first month of server with MineStrator using the code ACTU10!