
Installing a CurseForge modpack on your Minecraft server without doing everything manually is the fastest way to save time and avoid missing files. In 2026, most public modpacks can be deployed in just a few clicks directly from the MineStrator panel.
In this tutorial, you’ll learn where to find the modpack installer, how to pick the right version, and how to confirm the installation went smoothly using the console.
Prefer a video walkthrough? Watch it here (French): https://youtu.be/itlwOUnOU8Y
Before you install a CurseForge modpack
The automatic modpack install works through a clean reinstall. That means your server starts from a fresh base to prevent file conflicts, which is perfect… as long as you back up what you want to keep.
⚠️ Warning: This process deletes all current server data. If you need anything later, create a snapshot in the Backups tab before installing the modpack.
Open the Modpack menu in the panel
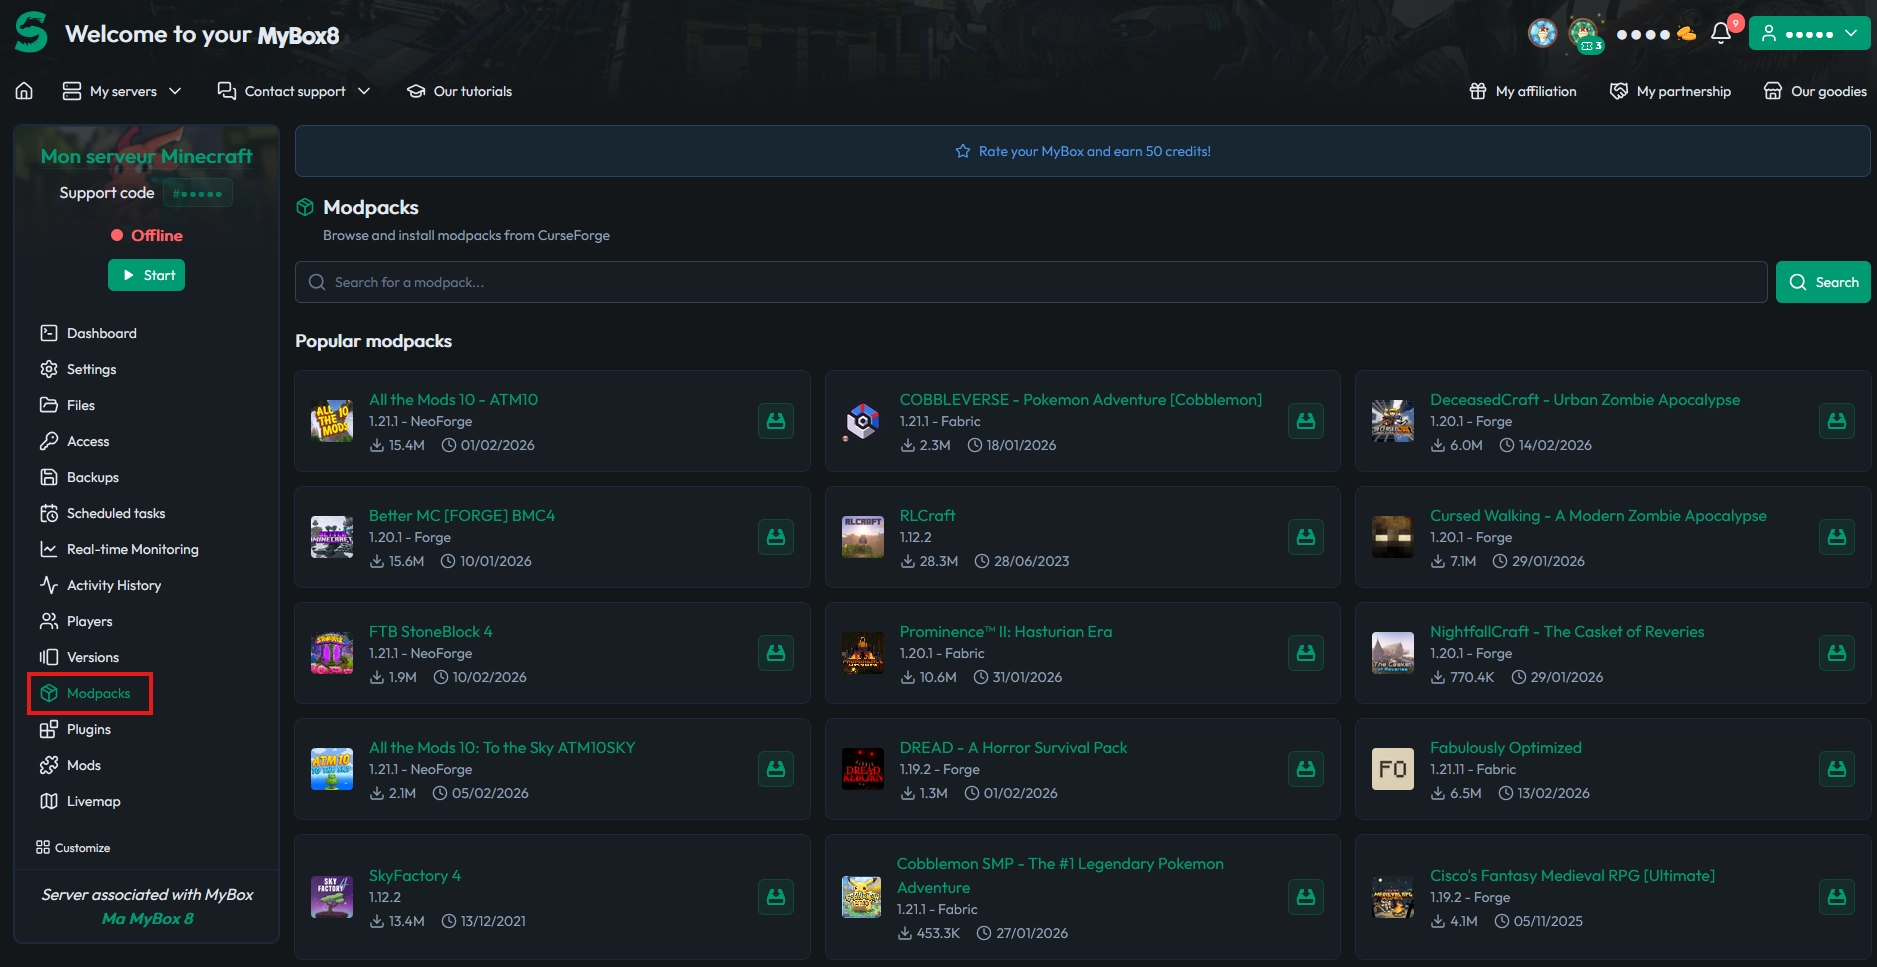
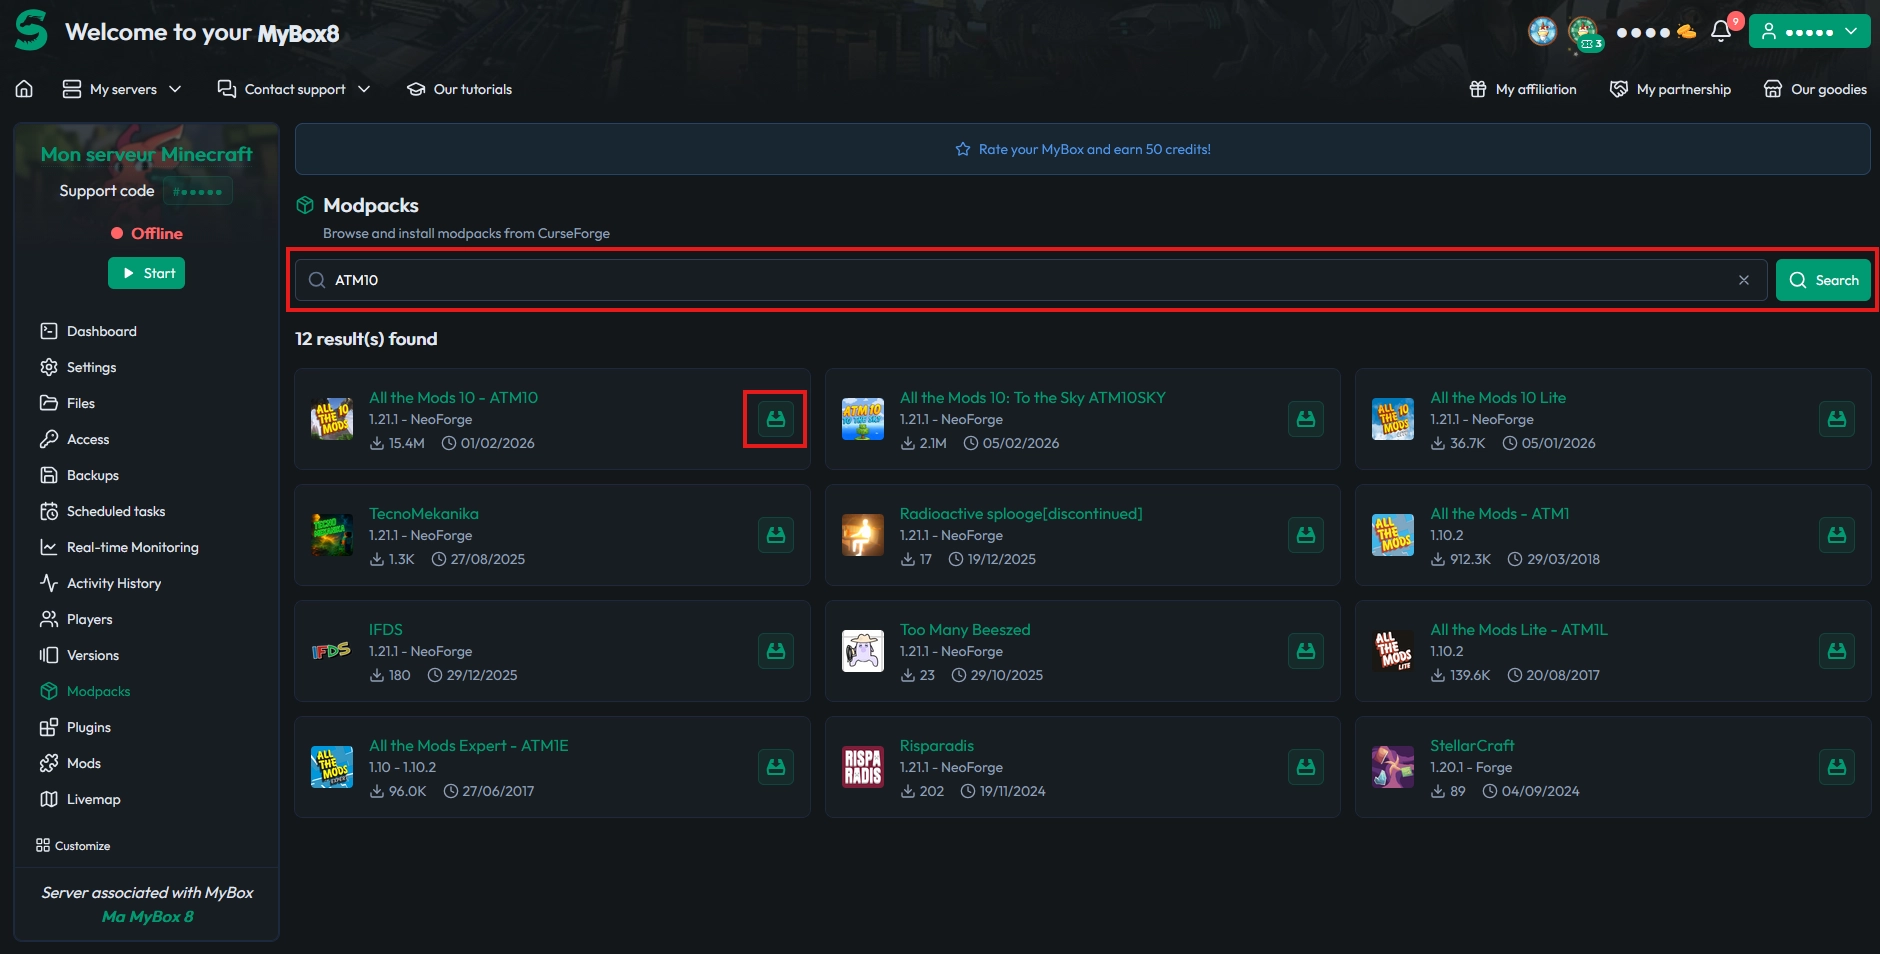
Log in to your MineStrator panel, then go to the Versions tab. On that page, click Modpack to display the list of modpacks available for one-click installation.
Find and select your CurseForge modpack
Some popular modpacks are shown by default. If yours isn’t listed, use the search bar to find it quickly, then click Install on the modpack you want to deploy.
Pick the version and reinstall cleanly
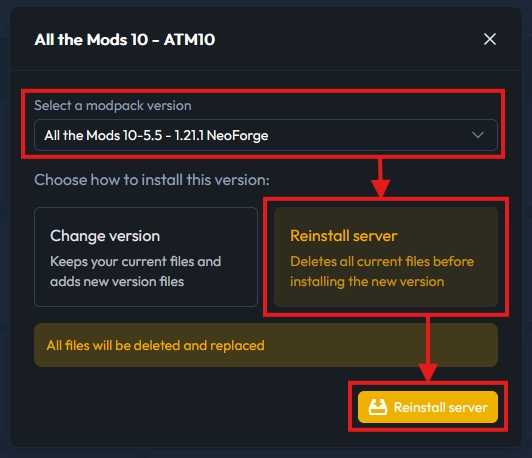
A window will pop up so you can choose the modpack version (1). Make sure it matches what you plan to play, and that your players will use the same client version, then click Reinstall the server to start.
This step wipes the current files to avoid conflicts. Finish by confirming the action with the validation button (3).
💡 Tip: If you’re playing with friends, share the exact modpack version number before launch to avoid “version mismatch” chaos.
Track the installation in the console
After you confirm, you’ll be redirected to the Console tab. From there, you can watch the modpack download and installation progress in real time.
Once the install finishes without errors, start the server and join using the same CurseForge modpack on your PC. New adventures await… and yes, the first “mystery crash” is usually a player on the wrong version.
📝 Note: The first startup after installing a modpack can take longer than usual while configs and libraries generate.
Questions frequently asked
Does it work with every CurseForge modpack?
The automatic installer works for public modpacks hosted on CurseForge and available in the panel’s catalog. If a modpack doesn’t show up, it may be private, removed, or not supported by the installer.
Some public modpacks only provide “client” versions. The panel will do its best to adapt them for server use, but you may sometimes need manual tweaks.
Do I also need the modpack on my PC?
Yes. The server installs the server-side mods, but you must also launch Minecraft with the same modpack and the same version on your client, or you’ll get connection errors and incompatibilities.
Why does the installation delete everything?
Because a modpack often replaces the full structure: mods, configs, scripts, and sometimes world behavior. A clean reinstall prevents old files from conflicting with new settings and reduces startup bugs.
Conclusion
You now know how to install a CurseForge modpack from the MineStrator panel: select the modpack, choose the version, perform a clean reinstall, then verify everything in the console. In just a few minutes, your server is ready to play.
Don’t have a server yet? Try it free for 12 hours, no credit card required, and deploy your modpack right away.

 Enjoy 10% off your first month of server with MineStrator using the code ACTU10!