
Hello! In this tutorial, we'll see how to transfer your progress to your ARK server. The first part will cover single-player games. Server games will be covered at the end of the tutorial.
Single-Player to Server Progress Transfer
To transfer your progress from a single-player ARK game to a dedicated server, you need to copy the save files from your solo session and place them in your server's save folder. Here are the main steps:
1. Find the Save Location
If you're on Epic Games or Steam, the location is different.
Epic Games
Open Epic Games and go to your library. Then on ARK, click on the ... then Manage
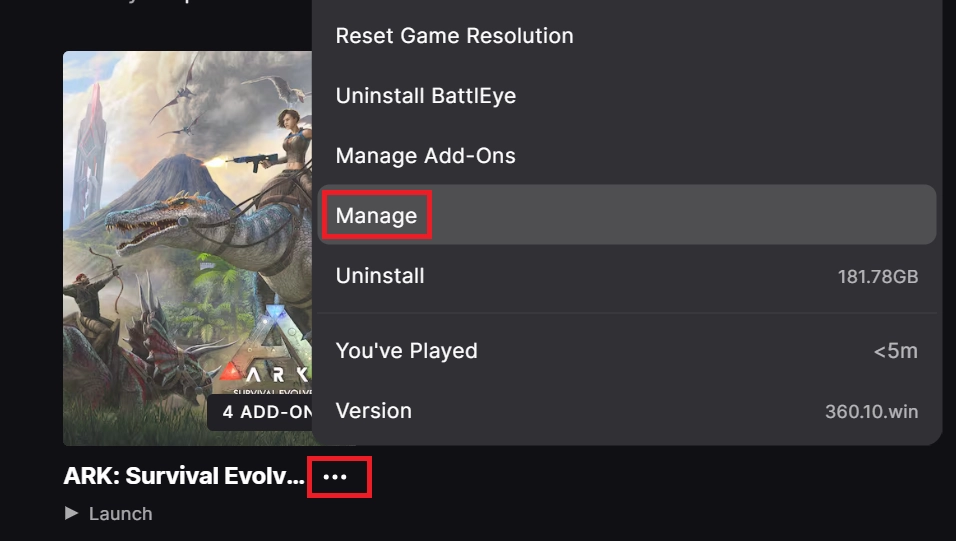
In the popup, click on the folder in the "Installation" section:
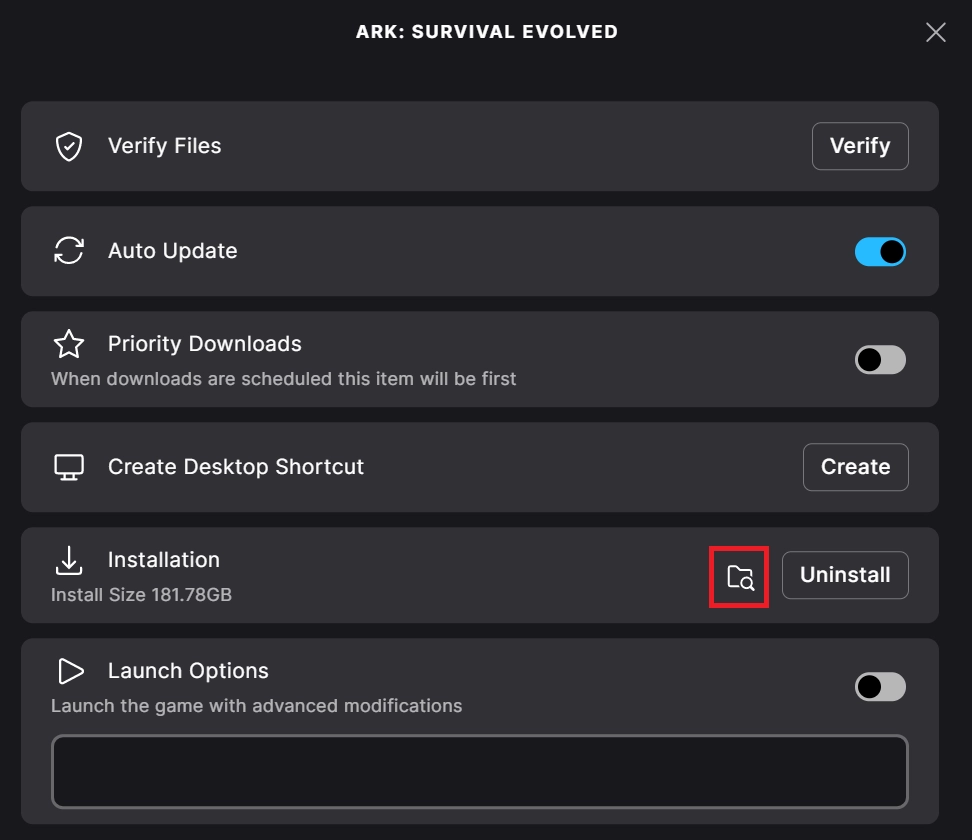
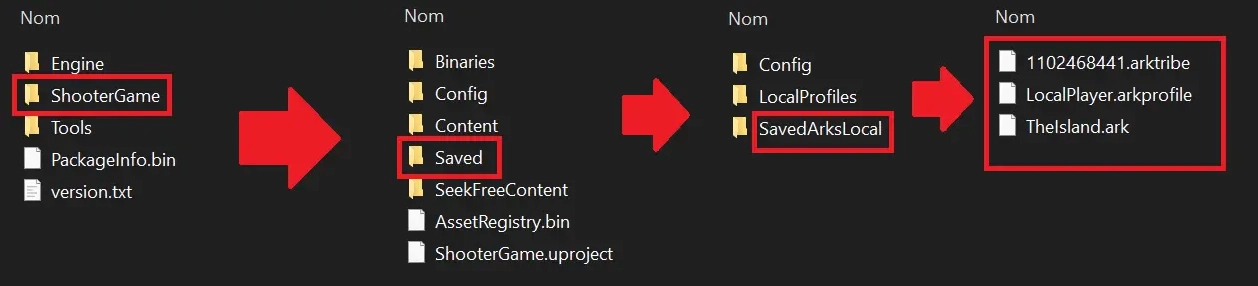
This should open a File Explorer. Then go to the ShooterGame > Saved > SavedArksLocal folder. You should find 3 files: the .arktribe file, which contains tribe information, the .arkprofile file which contains your character information, and the .ark file which contains the map save data.
Steam
Open Steam and go to your library. Then on ARK, click on the gear on the right, then Manage > Browse local files
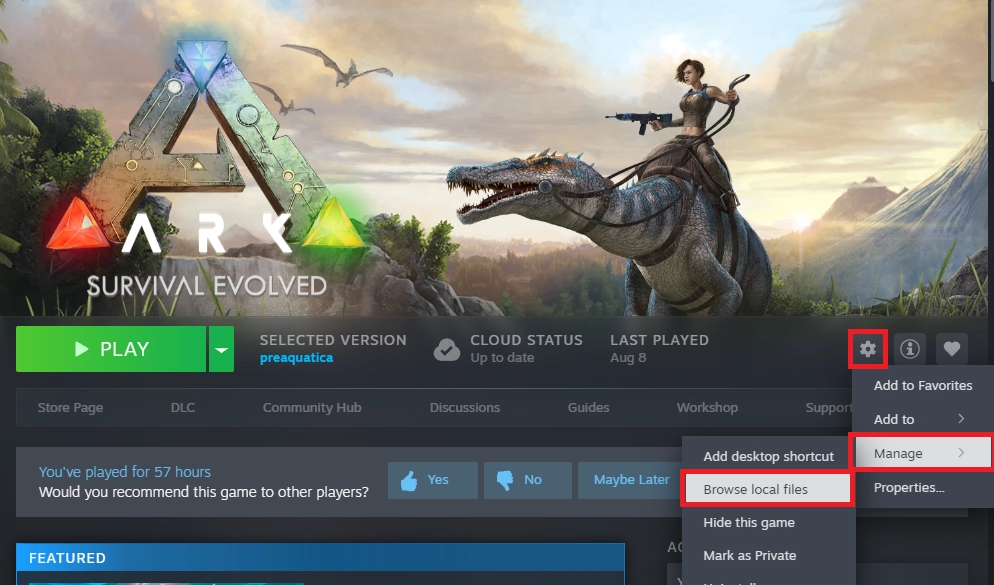
This should open a File Explorer. Then go to the ShooterGame > Saved > SavedArksLocal folder. You should find 3 files: the .arktribe file, which contains tribe information, the .arkprofile file which contains your character information, and the .ark file which contains the map save data.
2. Add the Map to Your Server
Start by shutting down the server if it's not already done. Go to the Files tab of your server's panel.
Next, navigate to the ShooterGame > Saved > SavedArks folder. If you have content in this folder, delete it. Then drag the three files into the SavedArks folder.
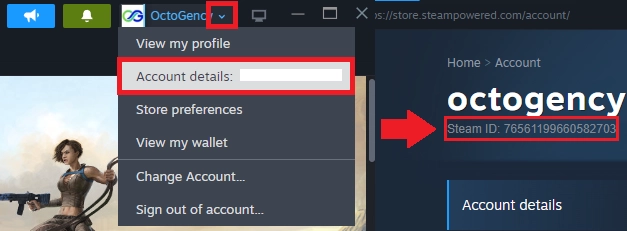
Next, rename the "LocalPlayer" in the LocalPlayer.arkprofile file to your Steam ID.
You can find your SteamID by going to your Steam profile:
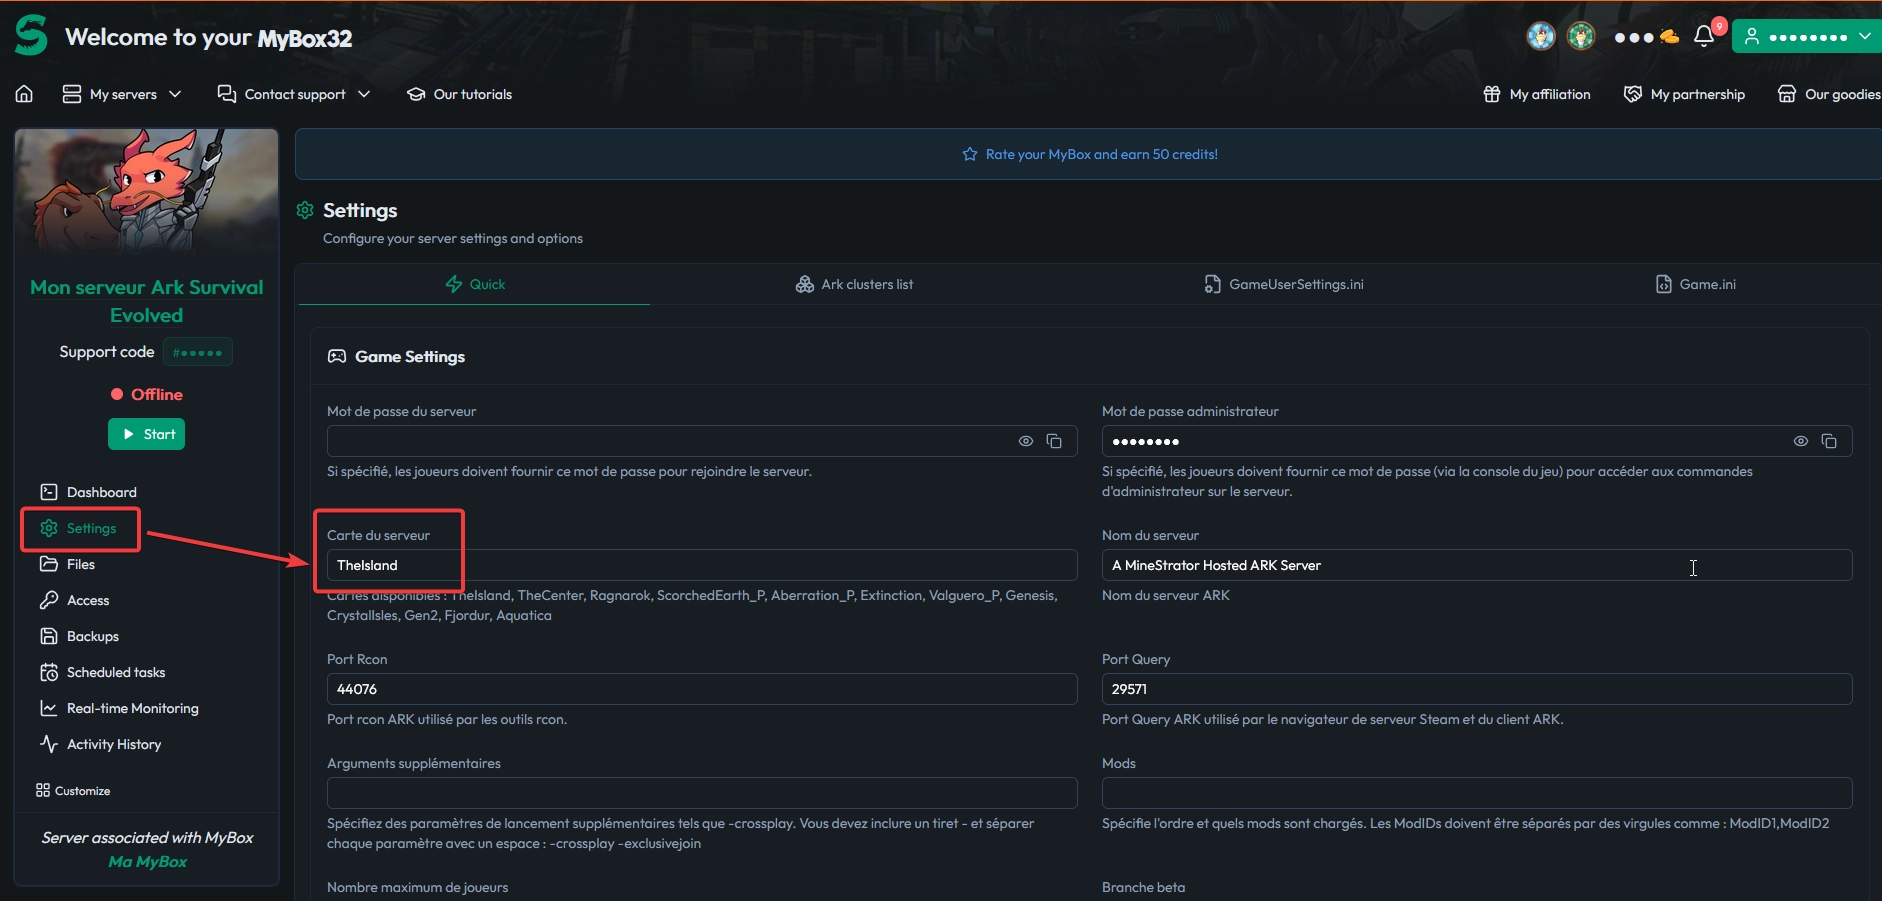
Once this is done, go to your Settings in the panel. Then change the "Server Map" (Carte du serveur) value to the ID of the map you had in single-player.
Map / Map ID
The Island / TheIsland
The Center (DLC) / TheCenter
Scorched Earth (Expansion Pack) / ScorchedEarth_P
Ragnarok (DLC) / Ragnarok
Aberration (Expansion Pack) / Aberration_P
Extinction (Expansion Pack) /Extinction
Valguero (DLC) / Valguero_P
Genesis: Part 1 (DLC) / Genesis
Crystal Isles (DLC) / CrystalIsles
Genesis: Part 2 (DLC) / Gen2
Lost Island (DLC) / LostIsland
Fjordur (DLC) / Fjordur
Save the changes at the bottom by clicking "Validate Settings", then start the server. And there you go! You have your single-player progress!
Server to Server Progress Transfer
Transfer Configuration Files and SavedArks Folder from One Server to Another
To keep all your settings (map, parameters, tribe/character progress), you need to copy the Game.ini, GameUserSettings.ini files and the entire SavedArks folder from one server to another. Make sure to make these changes once the server is shut down. Here's the complete tutorial:
1. Locate Files on the Source Server
Note: If your server is hosted on MineStrator, you can quickly access these files from the Files tab. If not, you’ll need to use the file manager or the (S)FTP access provided by your previous host.
Find the ShooterGame/Saved/Config/WindowsServer/ (or LinuxServer if your server is on Linux) directory in the Files tab and download the files:
Game.ini
GameUserSettings.ini
2. Locate and Retrieve the SavedArks Folder
In the Files tab, navigate to: ShooterGame/Saved/SavedArks/ (or, if it's a solo player/non-dedicated server, go back to the local "SavedArksLocal" folder)
Download all its content (map, profile, tribe, etc.).
3. Transfer to the Destination Server
Connect via SFTP to server 2 (destination). Copy the folders/files to the same locations:
Game.ini and GameUserSettings.ini → ShooterGame/Saved/Config/...
SavedArks folder/* → ShooterGame/Saved/SavedArks/
If the destination SavedArks folder already contains files, delete them before the transfer.
4. Restart Your Server
Launch it. The new files will be taken into account.
And there you go! You have recovered your server progress!
If you need more details, don't hesitate to visit our Discord, or submit a ticket on the panel!

 Enjoy 10% off your first month of server with MineStrator using the code ACTU10!